Making homemade yogurt is quite a simple process, but it doesn’t always turn out perfect every time. Runny, slimy, overly tart yogurt with poor texture or bad taste can be among the problems. So, how to make a perfect yogurt at home?

How to make Yogurt at home?
Method #1: Homemade Yogurt in Oven
Ingredients:
- 1/2-gallon Milk (raw or pasteurized, but not ultra-pasteurized)
- 1/2 cup Plain Unsweetened Yogurt or Heirloom Yogurt Starter
How to make yogurt in oven:
- Pour the milk in a clean pot and heat slowly until the milk boils.
- When the milk comes to a boil or until it reaches 180 F temperature, immediately remove it from heat.
- Let the milk cool down until 110 F (43 C). Use a thermometer or use a clean (freshly washed with unscented soap) finger to check. The milk should not be burning hot, it should not be too hot to keep your finger in the milk for more than a few seconds.
- Remove the thin skin formed on the top, if you don’t want papery shreds in your finished homemade yogurt.
- Whisk in the starter yogurt. Mix.
- Pour into clean jars leaving 0.5-1 inch to the top. Fit the lids.
- Place the jars inside the oven, close the oven door and turn on the oven light. Keep in the oven with the oven light turned on for 6-8 hours.
- As soon as the yogurt is ready, set aside couple spoonful for another batch into a clean jar. You can even freeze some amount as a starter for later use.
- Refrigerate when the yogurt is ready.
Pros of this method: Many have an oven with the light already, so it’s easy and accessible.
Cons: The temperature in the oven with the light on may vary, so you need to check every now and then. The results can be inconsistent.
Method #2: How to Make Yogurt using a Cooler
Ingredients:
- 1/2-gallon Milk (raw or pasteurized, but not ultra-pasteurized)
- 1/2 cup Plain Unsweetened Yogurt
How to make yogurt using a cooler:
1 – 6 steps as in method #1
7) Place the jars in your cooler and fill the cooler to the top of the milk line with hot tap water. The water temperature should be 110 F. Close the cooler lid and leave the jars to ferment for 8) 6-8 hours.
Refrigerate your finished homemade yogurt.
Pros of this method: Cooler is a highly effective incubator. Also, you can incubate a large amount of yogurt in it.
Cons: May take space
Method #3: Traditional Homemade Yogurt (on Your Counter)
Ingredients:
- 1/2-gallon Milk (raw or pasteurized, but not ultra-pasteurized)
- 1/2 cup Plain Unsweetened Yogurt
How to make a traditional homemade yogurt:
1 – 6 steps as in method #1
7) Wrap the jars with a thick towel and put them in a warm place for 12 – 24 hours or until thickens. Reduce the time if the room is too hot.
8) Refrigerate your finished homemade yogurt.
Method #4: How to Make Yogurt in a Slow cooker
Ingredients:
- 1/2-gallon Milk (raw or pasteurized, but not ultra-pasteurized)
- 1/2 cup Plain Unsweetened Yogurt
How to make yogurt in a slow cooker:
1) Use a crockpot or a slow cooker to heat the milk to 180 F.
2) Turn off and allow to cool for a couple of hours until the milk reaches 115°F temperature. It may take up to three hours to cool down.
3) Add culture and keep covered for 5-10 hours.
4) Refrigerate your finished homemade yogurt.
Pros of this method: Accessible.
Cons: Constantly checking the temperature of the milk while it cools down may contaminate the milk. Not the safest method.
Method #5: Thick and Creamy Homemade Yogurt
Ingredients:
- 1-quart Cow’s milk
- 2 Tbsp Live-cultured Yogurt or Bulgarian Yogurt Culture
How to make thick and creamy yogurt:
- Heat cow’s milk to 180°F. Heat slowly.
- Most important step. Hold the milk at 180°F for 30 minutes. You can do so by preheating an oven to 180°F. Heating the milk to 180°F and holding for 20 – 30 minutes denatures the whey protein lactoglobulin which then allows it to bind with the casein proteins. All of this protein dancing results in a creamier and richer yogurt product. If you heat it for too long yogurt may become grainy and coarse.
- Skim the ‘skin’ from the surface. Optional, if you don’t mind the paper-like texture.
- Quickly cool the milk to 115°F. You can use an ice bath or a cold-water bath. Stir the milk until the temperature comes down.
- Stir in the starter culture using the recommended amount in the package or use 2 tablespoons of live-cultured plain yogurt.
- Maintain the temperature between 110°F – 115°F for 5-10 hours. You can use one of the methods above to incubate the milk: oven light method, cooler method, slow cooker, or countertop method. You can also use Instant Pot to make your yogurt (method #6 below).
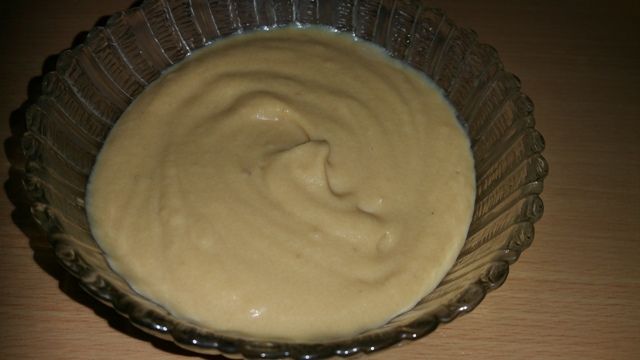
- Test the yogurt by tasting it. It should have the consistency of panna cotta.
- The yogurt will have a thick consistency. If you want to make it even thicker like Greek Yogurt, you can strain the whey out by placing the yogurt in a strainer or a colander lined with butter muslin. Use the whey for other purposes.
- As soon as the yogurt is ready, set aside some spoonful for another batch into a clean jar.
- Refrigerate.
Pros: Keeping the milk at 180°F for 30 minutes results in thick yogurt.
Method #6: How to Make Yogurt in Instant Pot
Ingredients:
- 1-quart Cow’s milk
- 2 Tbsp Live-cultured Yogurt or Bulgarian Yogurt Culture
- Instant Pot
How to make thick and creamy yogurt:
- Pour the milk in Instant pot.
- Close and lock the lid. Set the valve so ‘Sealing’.
- Select ‘Yogurt’ setting until the display reads “boil”.
- Cool the milk to 110°F – 115°F. It may take about 45-60 minutes to cool.
- Whisk in the starter culture or plain yogurt.
- Incubate the mixture by returning the pot with milk back in the Instant Pot. Close the lid. The valve can be set to ‘Sealing’ or ‘Venting’, doesn’t matter.
- Select ‘Yogurt’ setting. Adjust the temperature to ‘Normal’.
- Set the time to 8 hours for a standard yogurt. More (12 – 24 hours) for a tart yogurt.
- When finished, transfer the yogurt to a refrigerator. Chill at least 3 hours before serving.
- If you want to make a thick Greek yogurt, strain the yogurt in the refrigerator overnight. You can use a cheesecloth or fine colander, or even a nut milk bag. Reuse the separated whey in other recipes.
Troubleshooting
Why is your Homemade Yogurt Slimy, Thin, or overly Tart?
Slimy homemade yogurt causes:
- Wild yeast can land in your yogurt and makes it slimy. To keep wild yeast out of your yogurt, make sure the utensils you use are clean and the starter is good.
- A stringy slimy starter will produce a slimy stringy yogurt.
- In my experience, ultra-pasteurized milk produces slimy yogurt most of the time.
- Reusing yogurt as a starter over and over. The more you recycle the supermarket starter the more chances for wild yeast contamination.
- The milk was heated but was not brought to boil.
How to keep Wild Yeast away from your homemade yogurt:
- To keep wild yeast out of your yogurt, make sure the utensils you use are clean and the starter is good.
- After 3-4 batches, get a new yogurt from the market to use as a starter.
- Heirloom starters can be reused over and over without a problem. Supermarket yogurt may need to be replaced after a few batches, but not always.
- If you are using supermarket yogurt as a starter, keep using it as a starter until you get a slimy batch. Then buy fresh yogurt for a starter.
[…] 0.5 gallon of Buttermilk or Sour Milk or Cultured milk […]